Learn about the most important spring gardening tasks to begin now.

The time when flowers begin to bloom, bees start to buzz, and the temperature finally warms up after a long, cold winter.
Your garden is waking up!
Suddenly, you have a giant spring garden to-do list but you are unsure where to start.
Well, we are here to help you organize your tasks because we know you are busy.
Time to kick-start your yard into shape for the season.
Kind of like boot camp for your garden.
Read our Spring Garden Tasks post to learn the following:
- 5 tasks you should absolutely start now and steps to complete each task
- The average frequency needed to repeat each step throughout the year ahead
- Links to our FREE garden boot camp (starting in April 2019) if you need an extra dose of motivation
Alright, let’s dig in!
(By the way, this post contains affiliate links. That means that if you click on any of the links we are promoting, we might get a small commission at no cost to you which helps us run our website and podcast).
Spring Garden Tasks You Should Start Right Now
Weeding
Simply put, weeding is the removal and prevention of unwanted or invasive plants in and around your garden. The sooner you begin, the sooner you can stress less.
Keeping weeds under control in your garden means your plants will have more space to grow, have more light, sun, and nutrients to soak up, and also means you will have more time to do the other tasks below.
By the way, weeding can also relieve stress and provide you some great outdoor exercise. Weeding, for the win.
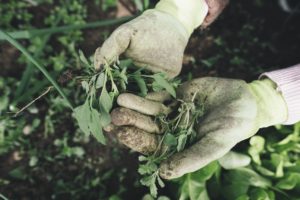
Pull those weeds!
To best weed your garden, physically pull or remove the whole plant and try to get the roots, too.
Tools you can use include:
- Your hands
- A small one-handed shovel called a trowel
- A shovel, or a hoe
There are other tools you can use to physically separate the unwanted plant from the ground.
Frequency: Medium-High. On-going weeding will be required all year long. Sorry, there is no easy way around this one, but there are steps you can take to lessen the number of weeds you will experience. Check the related articles below for more on that.
General Tips:
- Your spring garden can bring a lot of weeds to the surface. Stay on top of the work by weeding consistently.
- Be sure to be familiar with the noxious weeds in your city or county so they don’t get a foothold in your yard.
- You can check for your county’s noxious weed list by first going to the National Noxious Weed Board‘s website and then find your state and the county. Most lists should have pictures to help you identify unwanted interlopers in your garden, AND don’t hesitate to contact your county extension agency for more info, too!
Mulching
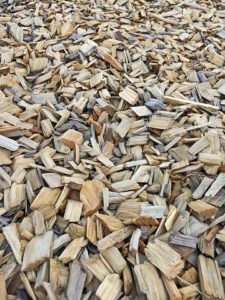
Bark Mulch
Mulch is the material you SHOULD be putting down over your freshly weeded garden bed areas.
Mulch can be chipped wood chunks or fine wood-dust, sawdust, compost, different kinds of rocks, burlap-bags, cardboard, newspaper, or other materials.
Used to beautify and retain moisture in your garden, mulch also insulates your plant’s roots, reduce erosion, improve drainage and plant health, and OF COURSE, suppress or prevent future weed growth.
Plus, mulching can help your spring garden look freshly dressed and ready for the summer months ahead!
Mulching is the actual placement and spreading of the mulch material in and around our garden. You can use rakes, shovels, or hoes to spread the mulch around.
Need more help? We have a FREE printable mulching cheat sheet right here!!
Frequency: Very low. Once a year, or every other year as needed.
General Tips:
- Be sure to only place the mulch close to, but not right up against, plant stems or trunks because this can lead to disease and pest infestations.
- Keep the mulch at least 2-3 inches away from plant tissues.
Pruning
What? – YES, we said pruning!
Pruning occurs when you need to remove plant material due to these 3 reasons:
1) Dead and/or diseased plant tissue
2) Rubbing/crossing branches that could rub in the future
3) The shaping of your plants.
[convertkit form=1114562]
Technically and horticulturally-speaking, pruning should really only occur after a plant has bloomed and gone through its normal reproductive cycle.
If it doesn’t get a chance to do this, then in most cases the plant will try to compensate by re-establishing or re-growing its flowers until it gets through its cycle. Meaning, the plant won’t be healthy or you may have to re-prune it a second time. Especially if other environmental factors align as well, like temperature, light duration, and plant overall health.
Pruning should only occur after a plant has bloomed and gone through its normal reproductive cycle.
Sign up for our FREE 7-day Smart Pruning Basics email course.
Learn smart pruning principles and graduate past newbie status in just 7 days. Gain access to this FREE, 7-day email course and Begin Your Pruning Journey today.
Using pruning hand-shears, loppers, or a hand-saw, determine what plant part you need to remove and use the cutting hand tool to cut the material.
When cutting, be sure to cut just above any buds to promote that bud to grow and direct future growth to that point.
Also, if removing a whole stem or limb, be sure to cut just above or past the trunk/branch collar so the plant can heal properly.
For a quick-and-dirty pruning lesson, click here and for a free pruning cheat sheet, click here!
Frequency: Low. Once or twice for the season, depending on the plant.
General Tips:
- Only prune after the plant has flowered and goes through its reproductive cycle.
- Some shaping can happen in your spring garden for plants in general, but major shaping and forming should be done later after flowering. Of course, you can do what you feel is best. They are your plants.
Two good examples of plants we prune in our garden:
- Rhododendrons – They should definitely be pruned for shaping AFTER it they have bloomed for the year. You can prune directly after blooming in the spring or summer (depending on which season it blooms in) and then also a quick refresh-pruning in the fall.
- Roses – They should be pruned in general at the end of their dormant season just as their buds are beginning to swell in late winter or early spring, but it really depends on the type of rose. We have a climbing rose and it’s best to prune these after they have bloomed and train them so they grow more horizontally. As with other roses, pruning out older canes, dead or diseased tissue, or stems crossing that are rubbing or could rub. If your climbing rose blooms multiple times during a year, then prune it at the normal time for roses according to your local climate, or when the buds begin to swell.
[convertkit form=5187179]
Fertilizing
Fertilizing occurs when organic or synthetic nutrients and materials are placed around plants.
It’s like a dose of vitamins for your plants that will help them maintain and improve their general health or promote flowering.
You need to fertilize in your garden so all your plants are as healthy as they can be.
Fertilizer can derive from organic sources, like compost from manure or decomposed plant or food material. It can also come from synthetic sources, like Miracle Grow.
Fertilizer comes in many forms and depending on that form will determine how you handle and apply it, so be sure to read labels and know what you need to get the job done.
General best practices:
1) Use compost around your garden beds or raised planter beds.
- This will supply nutrients slowly over time with the organic matter breaking down along with improving the soil structure and soil profile around your plants.
- This will also improve water infiltration and drainage, and soil microorganism habitat which any healthy soil needs.
2) Use synthetic, time release fertilizer for your potted plants and container gardens.
- This is because most potting soils are already optimized for drainage and infiltration with no need for soil profile improvement.
- You will need to replace the soil in your pots and containers each year anyway to decrease disease spread and pest habitat and have new, invigorated, uncompacted soil for your new plants for the year.
Frequency: Low. Once or twice for the season, depending on the plant.
Lawn Maintenance
A. Aerating
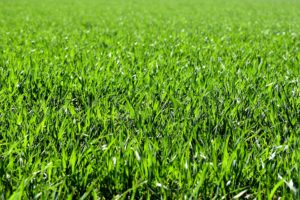
Want your lawn to look like this?
Aerating is the act of creating areas in your lawn allowing for more air and intake into the grass-roots.
This can be accomplished by either taking soil plugs physically out of the lawn soil or using penetrating metal spikes.
This is done to create air pockets in the soil so grass-roots can better respire. This also helps with water infiltration and soil drainage, where the water can penetrate deeper into the lower grass-roots.
Frequency: Low. Once a season.
General Tip:
- Aerating can also lessen any puddling of water that happens.
- Aerating can help reduce soil compaction, making it easier for grass-roots to grow and take up more nutrients, water, and oxygen.
B. Top-Dressing
Top-dressing is when the soil is added and placed in thin-sheets over existing grass to replenish the soil profile with sand, organic matter, clay, or another soil type.
Partly to add natural nutrients to the soil, help with drainage, water retention, and compaction, but also to help with any new grass seed that is about to be sown over the existing grass.
Add top-soil or other beneficial material by spreading it over your existing lawn in layers as to not completely bury it, but enough to provide new grass seed to be completely covered after being raked in.
Frequency: Very low. Once a year.
General Tips:
- A two-way or three-way garden soil mix is preferred where either has a mix of compost and sand and/or topsoil also. All of these provide structure and soil retention of water with drainage.
C. Seeding
New grass seed is spread and worked into the top-dressed soil by raking or mixing seed and soil.
Once the new seed germinates, it will blend with the existing grass to create a fuller, thicker, and healthier looking grass. This gives your lawn a rejuvenated look.
This is especially useful if you have recently thatched your lawn or demossed it and there are patches of grass missing causing the leftover lawn to look sparse.
After soil top-dressing, spread seed over the new soil either by hand or with a kind of spreader, and try to make your coverage as even as possible.
Next, use a leaf-rake and gently rake back and forth over the seed to work it in and mix with the top-dress soil. Do this until most of the seed is completely covered by the soil. Finally, water away!
Frequency: Low. If you have pets, maybe 2-3 times a year.
General Tips: (sorry, there are a lot)
- Be advised, lawn seeding is generally best in the late summer or early fall when day temperatures aren’t higher than 70-degrees and nighttime temperatures aren’t lower than 50-degrees. In most areas, fall and winter are usually wetter months (especially in the PNW where we live) and the new grass seedlings will have moist soil around them to keep growing.
- We are recommending seeding your grass in the spring only because it can give your lawn a new vibrancy and healthier look into the summer.
- If you do re-seed your lawn in the spring, be aware that you will need to watch your watering like a hawk and not let your lawn soil get too dry.
- You will also have to be VERY careful when mowing the newly seeded areas by raising the mower deck up at least 1/2 – 1-full inch or more in height so you don’t cut the new grass seedlings too low. It’s completely up to you when you seed your lawn, but just be aware of these points.
- Any seed needs to be completely covered with top-dressing soil to properly germinate.
- Exposed or not fully covered seed will have a harder time germinating and will most likely become bird or critter food.
D. Fertilizing
Same as discussed above, fertilizing occurs when organic or synthetic nutrients and materials are placed around plants for them to extract.
It’s like a dose of vitamins for your plants that will help them maintain and improve their general health or promote flowering.
Get your drop-spreader or broadcast-spreader out and fill it with a triple-16 lawn fertilizer (Scott’s, Lilly Miller, etc). Set the spreader according to what the product label says, and start walking.
Frequency: Low. Once a season.
General Tips:
- You can use either natural or synthetic fertilizers for your lawn.
- For the more environmentally-minded gardener, you should use compost or another natural source.
- For the time-sensitive gardeners out there who need a fast and easy solution, the synthetics are for you with the triple 16 or 10 lawn fertilizer made by Scotts or Lilly-Miller; their general “weed and feed” products work well.
- A natural fertilizer could work also, but be wary of using any full strength manures or fish-emulsions, as they can burn and kill any new grass seedlings.
Pro-Tip 1: Before you top-dress, seed, or fertilize your lawn, be sure to mow it first! If you mow after this, your mower will physically pick up a significant amount of seed, soil, and fertilizer along with any tall cut grass which you will be throwing away. You might as well pull out your money and burn it right now. So, mow first, THEN work in your lawn area.
Additional Spring Garden Tasks:
In addition to the 5 spring garden tasks above, some other minor tasks that can have a huge impact on your garden’s look and curb-appeal are:
1) Cleaning Driveways and Walkways
- Pick up any debris left over from the winter months.
- Blow off all areas using a blower.
- Pressure wash both areas.
- You might need a mold or moss killer to get it looking clean. By the way, be careful and follow the label instructions for any products you use.
2) Container Pots
- Plant seasonal splashes of color at your entrances, walkways, and backyard.
- Add seasonal interest using annuals.
- Accent your yard’s points of interest with strategically placed pots.
- Attract birds and pollinators early.
Helpful Garden Products
Below is an assortment of products we use to accomplish each of the tasks above.
Weeding
Have you ever used a Hula-ho? Or, even heard of one?
This is the perfect tool for weeding large areas in your spring garden clean up.
We cleared an old, forgotten side garden riddled with tall weeds in under an hour with this tool.
It is amazing and saves your back from all that pulling and stooping.
Mulching
We love this wheelbarrow and use it for everything around our yard, especially carrying mulch and soil.
It can haul up to 6 cu. ft. of material at a time!
Pruning
These Corona ClassicCUT Bypass pruners are a definite go-to in our yard. They cut sharply and precisely and last forever! They also happen to be one of our prizes in the Spoken Garden “Swag Bag” for 3 lucky participants.
Click here to join our Spring Garden Boot Camp. To read the rules of our contest, read this.
Fertilizing
Do you own a drop spreader yet?
We highly recommend this one because it can drop fertilizer, seed, and even ice or salt!
This drop spreader is perfect for fertilizing and an essential part of your spring garden clean up.
Lawn Maintenance
This power edger is the perfect tool for spring garden clean up and more.
If you want nice, clean edges along walkways or next to flower boxes, this is the tool you need.
We like it because you can adjust the height of the shaft (necessary for prolonged use if you don’t wish to kill your back).
Definitely consider adding this power edger to your shopping list!
Spring Gardening Conclusion
Based on your priorities, you probably feel like you have even more spring garden tasks to accomplish now. Prioritize your to-do list according to your own garden’s needs.
Hopefully, with our top 5 list above and a few recommended products, you can begin tackling these mini-projects one at a time.
Each step will take some time and energy but you will be rewarded each time you sit down and relax in your yard.
You will be thankful that you took the time.
Don’t forget to sign up for our Spring Garden Boot Camp Challenge!!
After reading this list, what are you top 5 spring garden tasks? Comment below and let us know!
Spring Gardening Related Resources:
- Best Pruning Tools for 2019
- 5 Natural Pest Remedies For Your Garden
- Top 7 Reasons Mulching Your Garden is Beneficial
Well, that’s all for now!
Thanks for reading and we hope we helped you. If you need garden info or further assistance, check out our Resource Library page for FREE printable freebies in our Resource Library!
For information about garden maintenance, check out either our mulching or our pruning page.
See you in the garden!
~ Sean and Allison
P.S. Find us on Pinterest, Twitter, Facebook, and Instagram so you don’t miss a thing!
P.P.S. Have you listened to our podcast yet? Check it out!
Spokengarden.com is a participant in the Amazon Services LLC Associates Program, an affiliate advertising program designed to provide a means for sites to earn advertising fees by advertising and linking to Amazon.com
